

I guess I'm just really into hair bows right now but I found another one that I really like. And this one can be used for anything that needs a bow!

To start cut your ribbon to the desired length. A little tip I learned about ribbon to keep it from fraying is to melt the end a bit. I did this with a lighter, just make sure you don't get it too close or it will turn black.

Then fold the ribbon into thirds with the ends poking out. (You can do the ends longer, I just think it looks cleaner this way.)


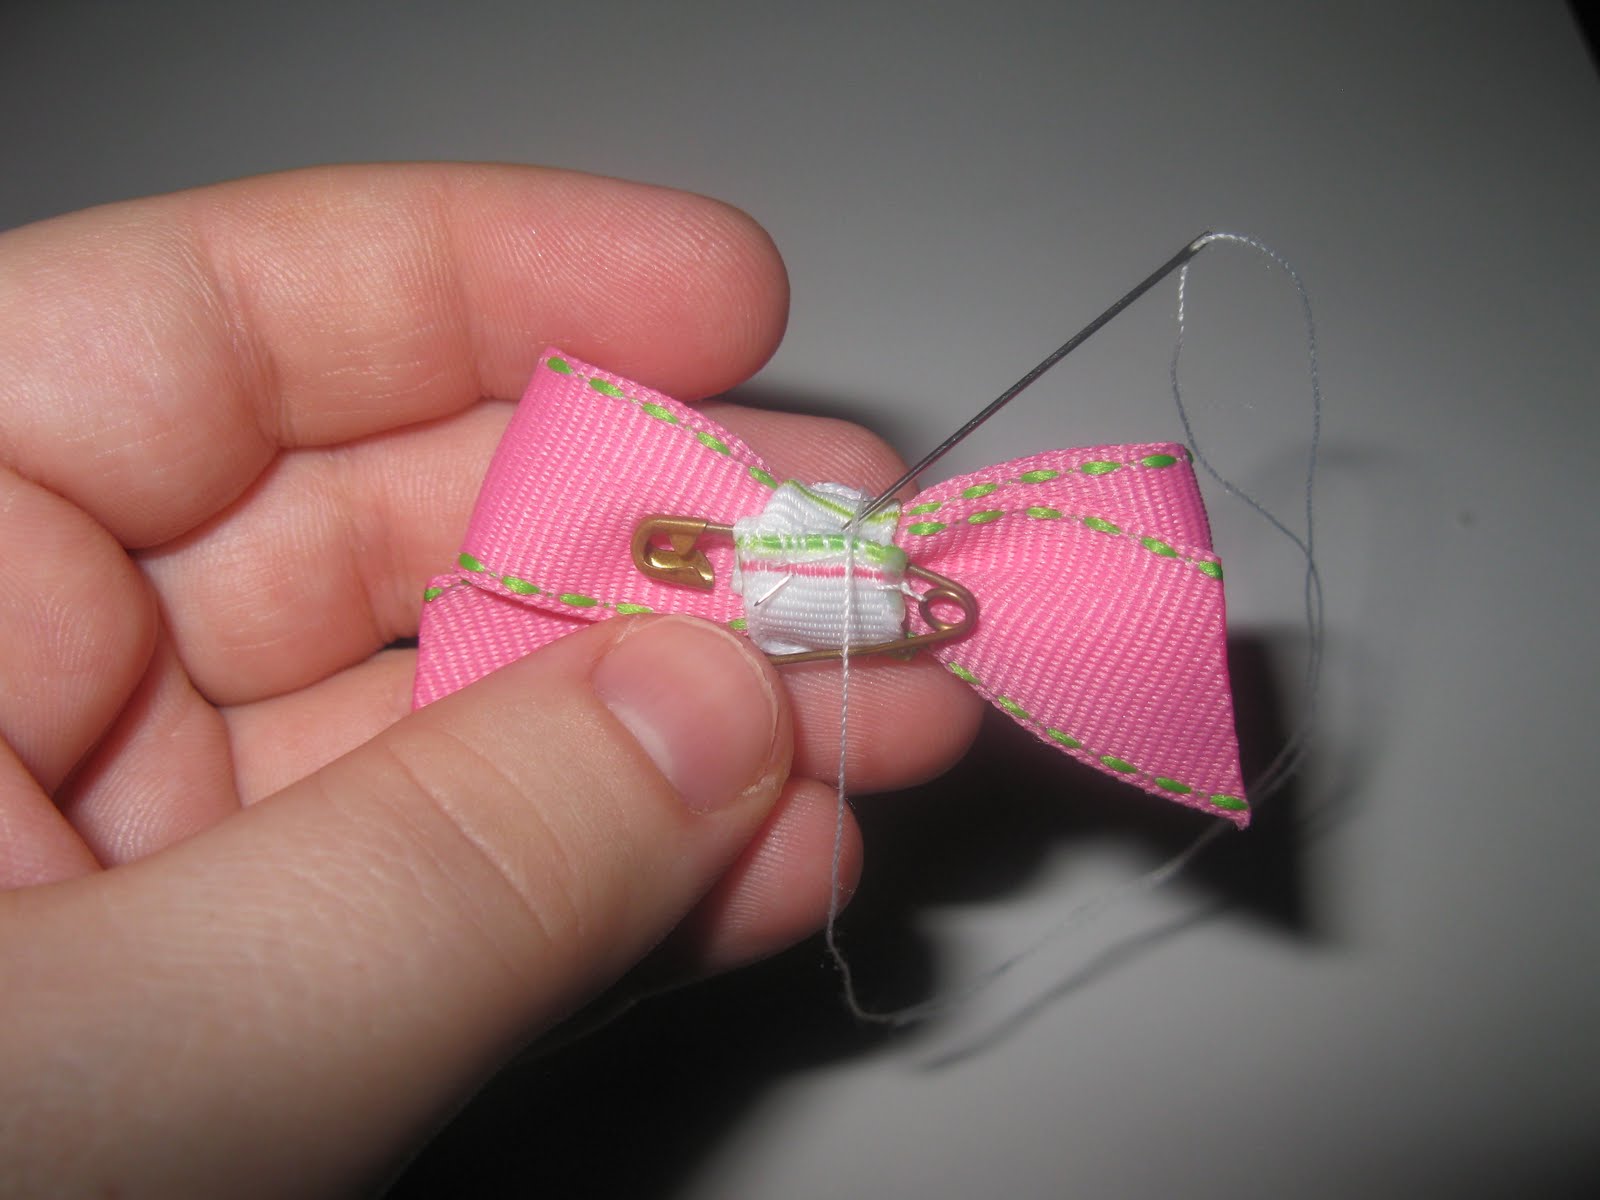
Then you pinch it in the center (there's really no wrong way to do this part- just pinch it). And stitch it in place. I like to wrap the thread around the center just to make it more secure.

Now to do the center ribbon- you can use the same ribbon or a different one that matches to give it more color. Tie the ribbon in a loose knot with enough ribbon on either ends to wrap around the center of the other piece of ribbon. (Don't forget to melt the ends on this one too.)
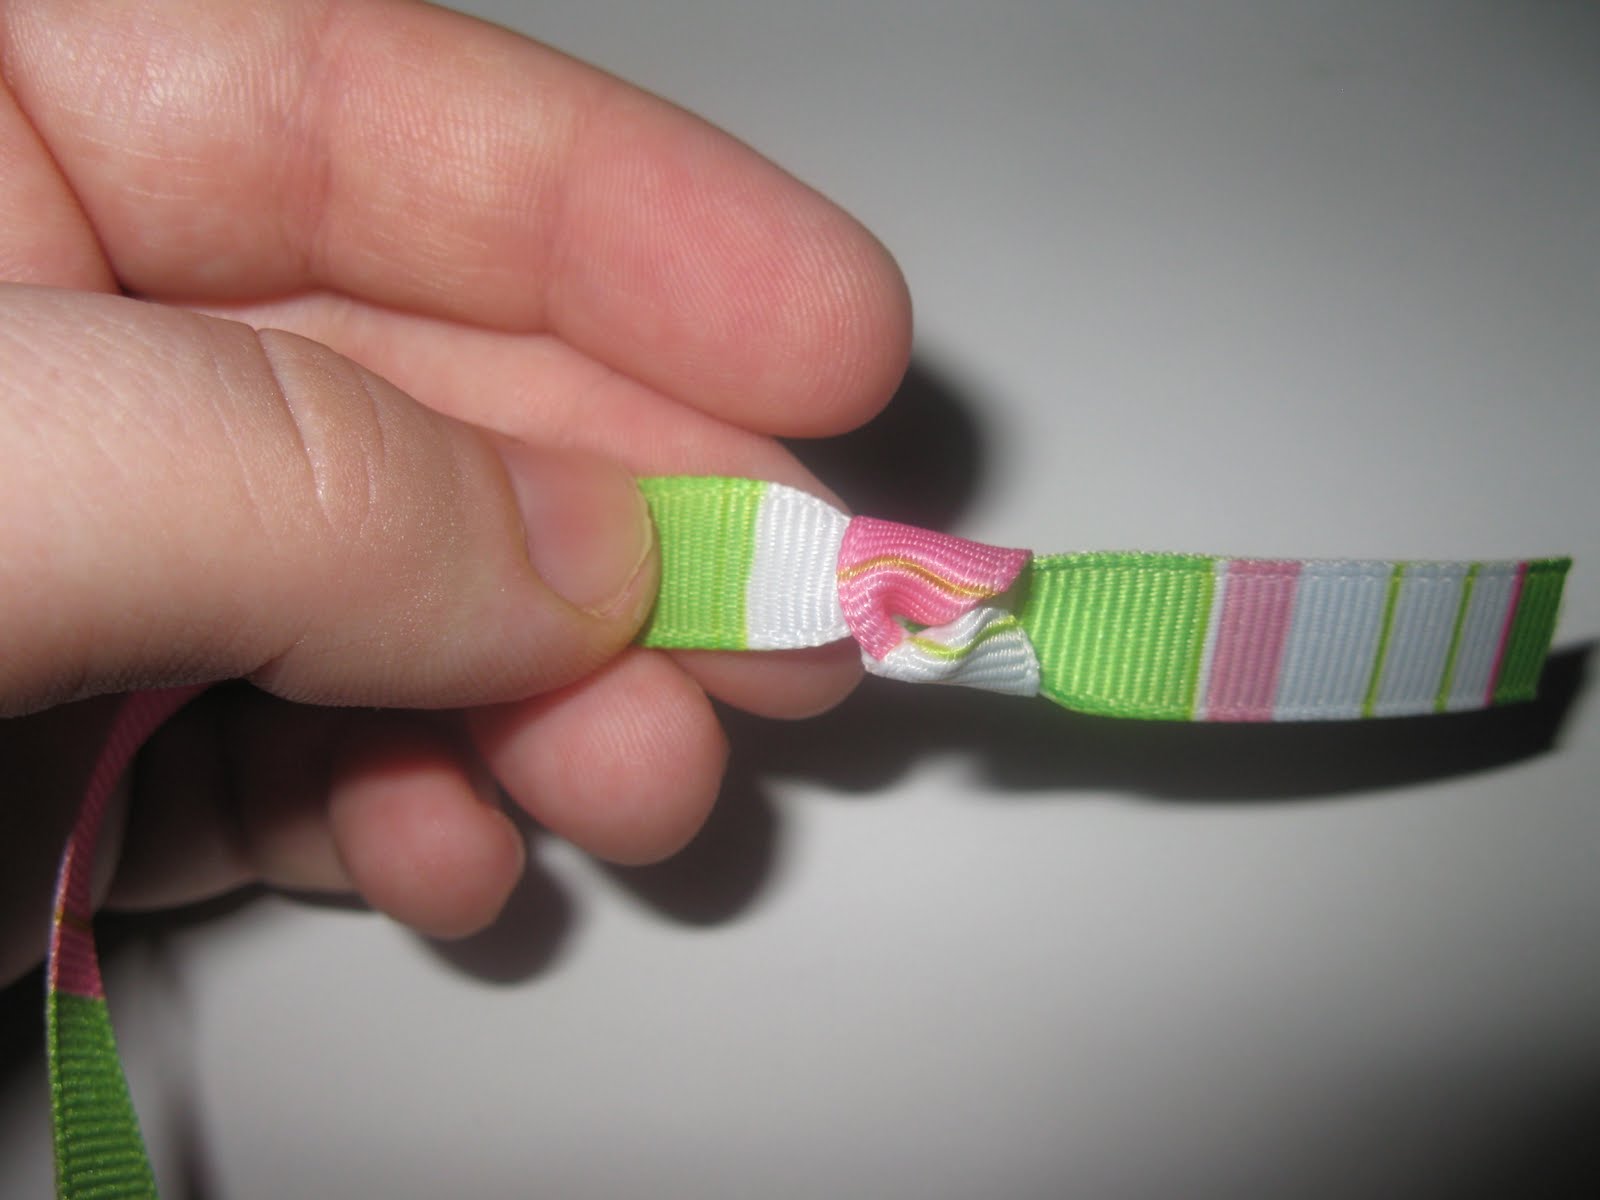
Wrap this ribbon around the first with the knot in front. Then stitch this ribbon in place sewing it through both ribbon pieces.

The finished bow- I think this would be a good present topper.

No comments:
Post a Comment