Pages

Friday, September 28, 2012

Decorating For Autumn: Leaves and Gourds

I love Autumn! 

It's my all time favorite season. Christmas is my favorite holiday and yes, I love the snow (when it comes for December then promptly leaves). But nothing tops the beauty of the red and orange leaves, the pumpkin patches full of funny shaped pumpkins and Halloween!

So in my house we decorate for fall as soon as possible.

And this year it's now!

I wanted to share with you how to bring the beauty of the outdoors, indoor; by making some tree "branches" and arranging leaf vines and gourds. 


This is how to decorate on a budget, it's all from the Dollar Store! 


This is an arrangement of flowers with some wheat in there, next to some leaves and fake gourds in a basket. And that cute little crow I thought it was a fun Halloween touch!


A fake pumpkin with leaf vines, and a cornucopia filled with a fake squash and dried corn.


This is the one I show you how to make!


Supplies:
-Gourds of any kind and shape
-Sticks 
-Leaf vines (I use 4 from the Dollar Store)
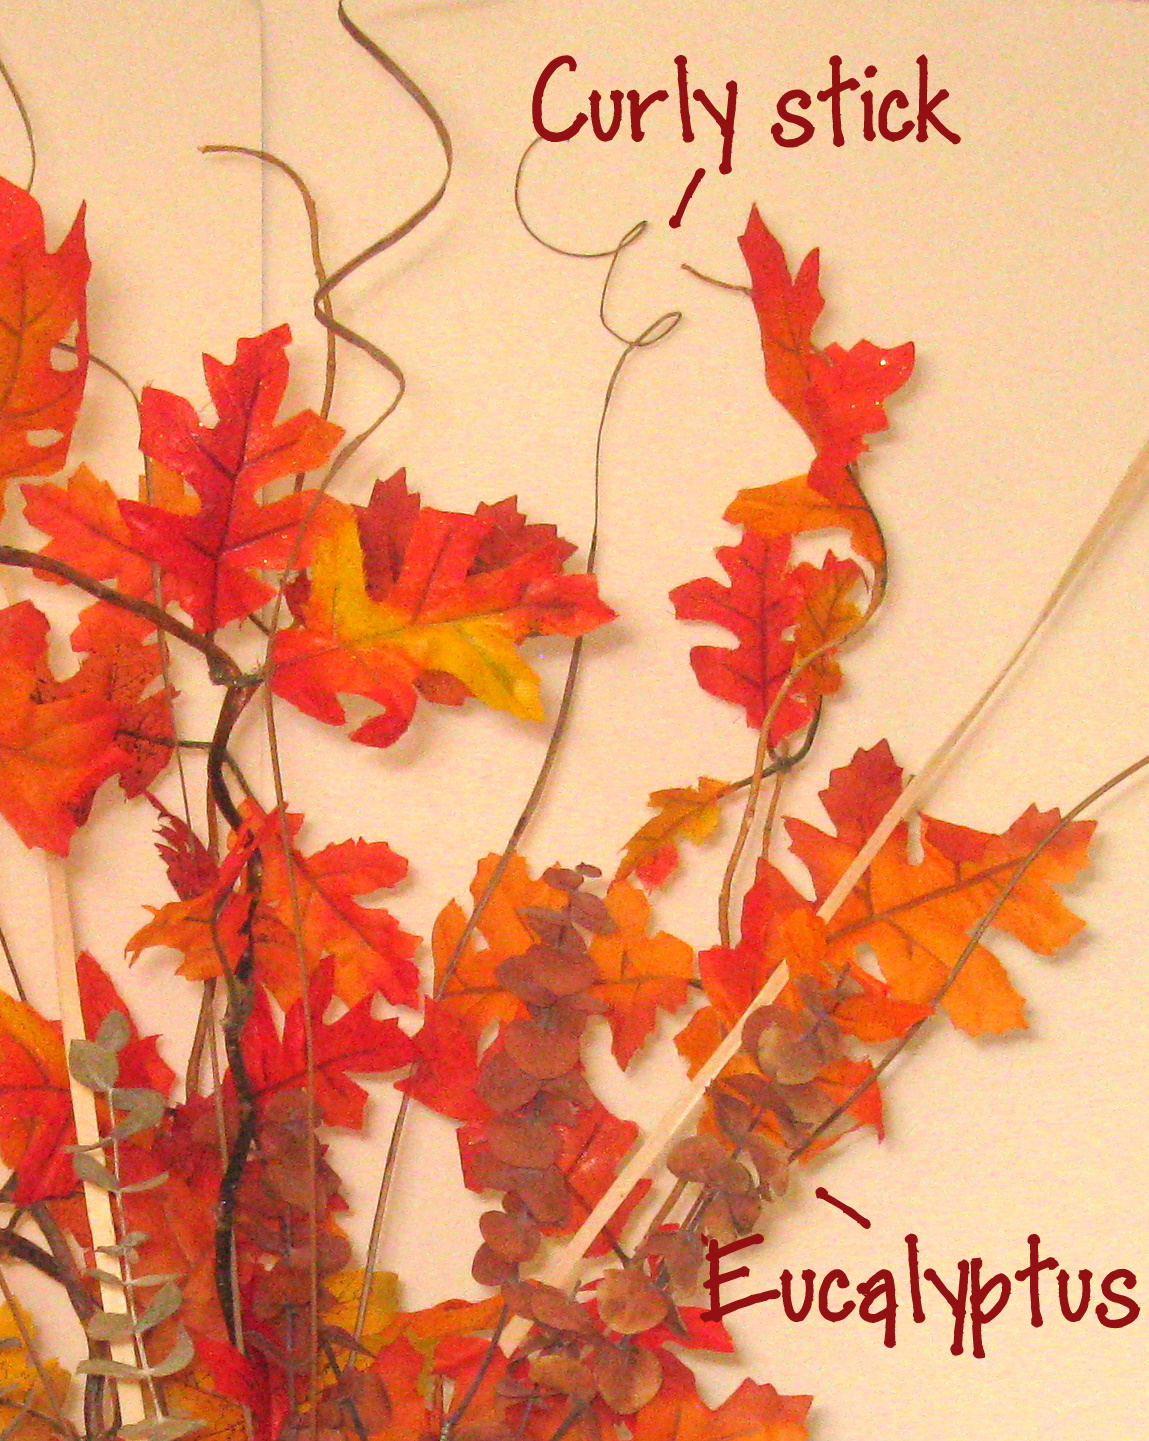
-Bundle of curly sticks and eucalyptus (or any other filler)
-Hot Glue 


First to make the Branches:
Take the sticks you want to use and separate them. (My sticks are very crooked but straight will work also.)

Then you want to remove the leaves from two of the vine bundles.


Arrange the leaves the way you like. I tried to make the placement of the leaves look more natural, like a real tree branch. Then glue them in place using hot glue. (hint: hold the leaf in place for a while until the glue hardens, do this for each leaf.)


Next put the sticks together so they look fairly symmetrical and wrap some of the extra, bare vine around the bottom and hot glue them to hold the "branches" in place.


Then add some of the filler, curly sticks and eucalyptus. Some wheat stalk or dried berry clusters would look great as well. 


As for this fall arrangement nothing else is needed, simple put it in a vase!


Now to place it. 
I always love to put arrangements like this one on the counter near the front door. That way when you enter your house the red and orange leaves are welcoming you home. The vase puts the arrangement high enough to place some gourds and vines around  the base. 
Like so...


There it is, a beautiful piece of Autumn in your home to enjoy!

Friday, September 21, 2012

Menu Board


I hate trying to decide what to make for dinner everyday,
especially when my husband ends up not liking what I picked.

So I decided to make a menu so he can decide what he wants ahead of time and I know what to make every day- it makes life much easier. Also grocery shopping is easier because I always know what I need to get.


  Supplies;
-Srapbook paper
-Close pin clips
-Pen
-Elmer's glue
-Hot glue gun & glue

First I started by making the Menu label. All I did was use some scrapbook paper some plain blue, then some patterned paper. I glued them together and then wrote Menu on them with a pen.


Second I made the letters S, M, T, W, T, F, and S for the days of the week out of the same paper I made the menu label out of. Then I hot glued the letters to the close pin clips.


 Next I used an old butter box and cut it in half. I glued this patterned paper to the box with Elmer's glue. Then with the plain blue paper, I wrote dinner's on it and glued it to the patterned paper. I made this box to put the different dinner options in.


 Then I used Elmer's glue to glue down the menu label and the close pin clips to the green and white scarpbook paper.  I also glued the dinner box in the right bottom corner with hot glue.


 TADA- this is my dinner menu, I hope you like it. I put mine on a clip board in my kitchen on the wall,

 so its in sight and in mind

so I don't forget to pull out the meat to thaw.

Friday, September 14, 2012

Wind Chime Re-do

Ahhhhh... The wind. 

I love a good cloudy, windy, drizzly fall day. I know it sounds weird but I love the rain. 

So when my mom told me she found a long forgotten wind chime in her potting shed I thought this would be another great way I could enjoy this windy autumn weather.  


After 

The new charm


 Here you can see the glass beads.

Before
(The Before: covered in rust and hard water buildup from the rain.)

 You can't really tell from this picture but the pipes have stains of hard water, the charms are rusted and the strings are corroded to the point of disintegration. What this wind chime needs is some good TLC. 
Follow along with your own old wind chime that needs a face lift or you can find one at your local thrift store.

Supplies:
-An old wind chime with pipes intact 
-Paint 
-String
-New Charms
- Some Glass Beads 


First I took apart the old wind chime, thew out the old strings and rusted charms, and washed the pipes (they ended up being so full of muck that they made a thud sound instead of a chiming one.) Then I painted the wood top, if the wood had a varnish or paint you would need to sand it first. Make sure not to cover the holes with paint I used a bent straight pin to poke out the paint.  


Next I re-strung the pipes the way it was before with some new string, re-strung the hanging part and added a new charm. 


Then I re-strung the middle string and added the metal disk about half was down the pipes (this piece hits the pipes to make the chiming sound.) After that I added a charm followed by a knot to hold the disk in place.


Next I finished the middle string off with a charm on the bottom to weight the string down and catch the wind, the most important element of a wind chime!


Lastly I added four more strings with glass beads so the wind chime would have a more beautiful sound. 


To keep the beads in place I put a knot before and after each bead.


Here it is.... just in time for the wind and rain my very own melodious chime. Now I can hear the beauty of the fall as well as see it! 


Friday, September 7, 2012

Scrapbooking: Using Paper - For Framing

Paper is one of the tools Scrapbookers use most. Not just for attaching the pictures to, but to enhance the page's look,  paper can be used for almost anything. 

When making scrapbook pages using a layout (my preferred method- here) the layout will usually show you where to put your pictures and how much paper to use. However to make the layout fit your memories you will probably need to make adjustments.

In this tutorial I want to show how to use paper for framing pictures and embellishments for your scrapbook pages. 


Framing

There are two kinds of basic framing in front and behind.

In front is where you cut a hole in the paper and lay it on top of the the picture (or whatever you are framing).

Like this one.

Behind framing is the paper, usually the same ratio as the picture, placed behind the picture.

Like this one (here we have two).

With both kinds of framing you can offset the picture to add interest or do different shapes and paper, be unique and try different things.
I personally like to frame almost every picture.

Faming Embellishments

There are endless types of embellishments you can make, any embellishment can be made out of paper. (Remember embellishments are the beautification of a page through ornamentation. And should enhance the memory or moment you are preserving.)

Both of these examples are simple and use small scraps of paper along with a button or brad in the center.

This is a flower embellishment using cut out shapes put together.

Here is some paper cut out hearts, each one framed.  

Even if you have a small scrap of paper you can make an embellishment, then frame it to make it look bigger. These heart embellishments were really small by themselves but I added two frames and grouped them together with a third frame. It's really simple but it works. Paper scrap embellishments are a great way to add interest without spending a lot of $$$.

This is what the page looks like all together.
(lots of framing!)