Pages

Friday, July 27, 2012

Cute Lamp Redo

I really needed a lamp to go on a console table in my entry way.

I found this lamp at the goodwill for 3 dollars I hated the color but I thought that it had a lot of potential.


Supplies:
-A lamp
- Spray paint meant for metal
- Lamp shade
-Ribbon

First spray paint the lamp base. (I forgot to take a picture so this is half way through painting.) It was originally a matte navy blue color and chipping, yuck. I used Rust-Oleum glossy white spray paint; it worked the best. You can get it at any hardware store and it's not expensive.


See how great the base looks with some new paint.


I got the lamp shade separately, also at goodwill, for 7 dollars. It was brand new from Target and not even opened. I added some ribbon to give it some color.


 I added 3 small bows where the ribbon met up together to hide the hot glue mess.
(If you need help with making a nice bow you can use this tutorial here.)


Such a cute lamp now :)

Friday, July 20, 2012

Poof Foot Rest

Sometimes after a long day of taking care of a baby you want to put your feet up.
 Or even when you didn't it's just nice to have something soft and plush to rest your feet on. 

Gliders usually come with matching ottomans, however ours was not included.

So I thought why don't I make a foot rest/poof that matches her room decor, then she can use it too, as a seat!

If you would like to make a poof for little ones to sit on or for your feet...
 follow along!


For putting your feet up.

A comfy seat for your little one.
(she's a drooly cutie.)

Also has a zipper so you can conveniently wash it when it becomes dirty.

Supplies:
- 16"x 57" of soft fleece and one of cotton (for casing)
- Two 18" diameter circles of minky and two of cotton (for casing)
- 16" zipper
-Sewing machine and supplies


*Figuring Measurements*
If you would like to make the poof another size or if the circle is hard for you to make at my dimensions I will show you how I figured out the measurements.
 1. First decide how tall you want your foot rest/poof to be- mine is about 16 inches.
2. Remember that a cylinder is made up of 2 circle pieces and 1 rectangle.
 3. Then I traced a bowl onto paper and used this as a pattern for the circle (you can use any circle in your house that you can trace onto paper).
4. Then measure the circumference of the bowl and that will be the length of the rectangle- mine was 56" 
5. Then add an inch for the zipper or seam allowance. 


For the casing

The casing is to help the poof keep it's shape. Also having a casing will make you able to throw the slipcover in the wash without having to un-stuff it. I used an old cotton sheet however waterproof fabric would be good if you plan on little kids using it often. 

Start with your rectangle casing piece, fold the 16" edge in 1/4 inch then press, and sew. 


Then pin the circle piece to the long side of the rectangle. Let the rectangle over lap if it does. Then sew it and repeat with the other circle.
And that's the casing.


Now the Slip Cover.

We are going to attach the zipper first by opening up the zipper. Then lay the one zipper side on the 16" rectangle side. Make sure that the right side of the zipper (or the zipper front) is facing the wrong side of the fabric, so the pull tab will face out when it's all sewn together. Then pin the zipper side a 1/2 inch from the edge, this will make the overlap that hides the zipper. Then sew it on.

Next pin the other side of the zipper to the other end of the fabric, this side is pinned right on the edge. Make sure nothing is twisted and then sew.

Then you want to zip the zipper up. Your rectangle should now be a tube. Here I put a pin at the bottom of the zipper and cut off the excess zip. (You can also do this step after you sew on the circle pieces.)


Pin on the circle pieces. This time you should have no overlap, but if there is some you can ease it in while you sew.

Then sew them together and finish by surging or zigzagging the edges.

Then you will want to turn the slip cover right side out and put the casing inside the slip cover.  Straighten it out so the circle parts and opening match up. Next stuff the poof. (I used a foam piece around the edge to give the poof more support and 2 bags of Polly-fiberfill).

To keep the stuffing in hand stitch the casing opening closed, with whatever stitch is easiest for you.

Zip it all up, plop your feet on top and enjoy! 

Friday, July 13, 2012

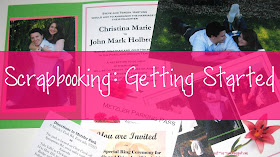
Scrapbooking: Getting Started

Scrapbooking, 
it's a great way to preserve your memories for yourself, friends and future generations to enjoy.

I love scrapbooking, not only is it organizing, but it's crafting two.
(Some of my favorite things :)

I've had a lot of friends say they would scrapbook but it's too expensive and they don't know where to start. Well I want to show that anyone can scrapbook!

It can be easy and inexpensive. 
Give it a try and follow along with me.


Supplies:
-Some kind of organizational system for your pictures
-A book or magazine of scrapbooking layouts or the internet
-Lined paper and pencil to draw your layout on
-Pictures
-Paper and embellishments (amounts vary depending on the layout you choose)

The first thing you want to do is get your pictures organized. Here are some ways to organize your pictures:


1. One of the simplest ways is in a photo box. (They are essentially shoe boxes that are cute and have labels on the front.) This is like a small filing box with each picture in a section divided by a piece of card stock, which is labeled, like so: 
 
This system works well if you have a lot of printed photos. However it takes up space and the photos will start to deteriorate after a long time (50 years or so). 

2. Another way to organize your pictures is on picture CDs and keep them in a special binder. Each CD has a log in thumbnails of all the picture the CD contains as shown here:


  This system is a good space saver and it's nice to have all the thumbnails of each photo. However to get the thumb nails you have to get the CD made at the store. Each CD costs about $3 depending on where you get it from, and each CD holds about 350 pics. So it can end up being fairly expensive and CD's can get scratched or damaged.

3. The other way is to have all of your pictures saved on to your computer and backed up on a flash drive and/or on an online account (ex: Walgreens.com, Picasa online, Snapfish, or any other.) Most systems are free and with Walgreen's and Snapfish you can order your pictures directly from them. (Which costs money of course.) This is a great way to store your pictures but if you don't have easy access to a computer it makes planning your scrapbook pages hard. Also you have to plan ahead a bit to get your picture when you need them because they aren't right at hand. This method of backing up your files will last as long as there are usb ports, which could mean almost indefinitly. 

I myself have a little of each. None the less whichever way you choose the next step is deciding what you want to scrapbook first. A good way to organize your pictures is separating them by event going chronologically. Like pregnancy, baby shower, birth, first steps, etc. 

To start out choose the first event you want to document. For this example I'm doing a wedding book and starting with the engagement pictures and wedding invitations.

First I
gather the pictures and items I want to include.


Next I find a layout I like.
I usually find good layouts at scrapbook.com (I go to their Gallery; Layouts; Sizes; 24x12 -which is a 2 page layout of 12x12 pages.) Then I draw the layout making it work with the pictures I have. I usually draw out a group at a time. 

Then I get paper that goes with the theme (like red and green for Christmas) or colors that match the pictures. It's less expensive to buy the paper in packs, on sale and to save your scrap paper. Most of the time you only need a square or two of each color so the rest of the paper can be saved for another layout. You will also need embellishments: which are anything that add beauty to your page through ornamentation ex: buttons, brads, eyelets, ribbon, stickers, lettering, words etc. 
(You will know how much paper and what kind of embellishments you need by looking at the layout you chose.)

Then put it all together using your layout as your guide. So make sure your sketch of the layout is detailed enough for you to remember what goes where and how much.

(I will go over paper use on the next Scrapbooking Blogs.)

Friday, July 6, 2012

Scrappy Picture Frame

When I was at my local craft store I saw these unfinished wooden frames pleading to be something cute! So I got one to go with a post card I had of some old spools of thread, I thought it would be a good addition to my craft closet. And I wanted to show you all how it turned out.


Supplies:
-an old or unfinished picture frame
-some scrap paper 
-embellishments (I used old stickers, buttons and some string)
-mod podge 
-paint
-some scrap fabric and 3 cotton balls
-fancy dressmaker pins


First I started with an unfinished frame, I painted it blue and found some paper and embellishments I liked.


Next I cut the paper to fit around the frame making it look like a scrapbook page. I put the paper on where I thought it should go and mod podged it on. (Mod Podge is a brand of decoupage. It's like glue that dries clear and seals what you put it on.)


Then, once it dried, I used hot glue to attach the embellishments. To make the buttons look sewed on I threaded them as if sewn and then hot glued them on.


Next I thought it would be fun to make a tiny pincushion to put on the frame. So I took a small square of fabric and put 3 large cotton balls in the center on the wrong side of the fabric. Then I wrapped the fabric tightly around the cotton balls, trimmed the excess fabric and hot glued it together.


Then I glued the fabric puff ball onto the frame inside a small paper frame embellishment. And added the finishing touch, some cute dressmaker straight pins.


There you have it from unfinished- to so cute! A perfect way to display your scrapbooking skills for all to see and enjoy.